
Groups and Divisions
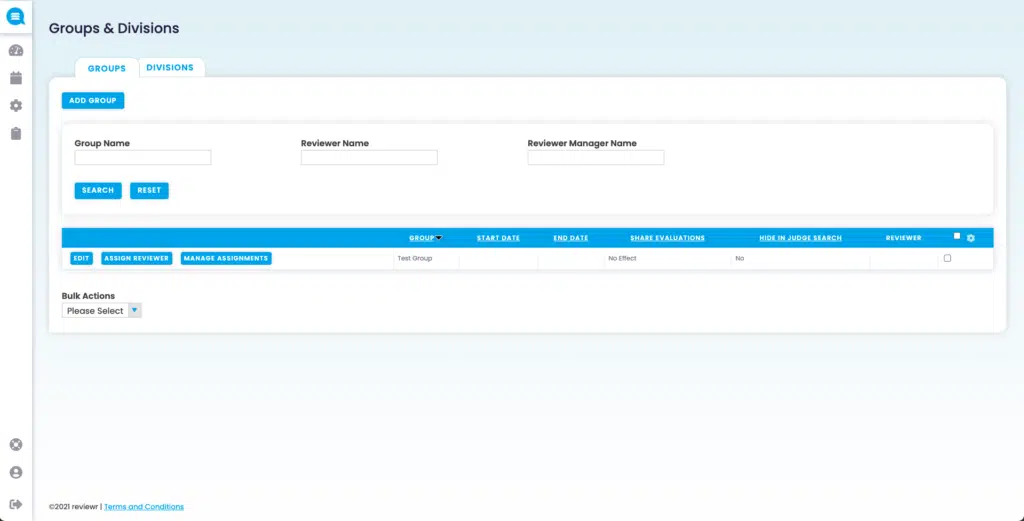
This is the Groups and Divisions page. This is where you go to create or edit groups or divisions for an event.
Group
To add a group, select .
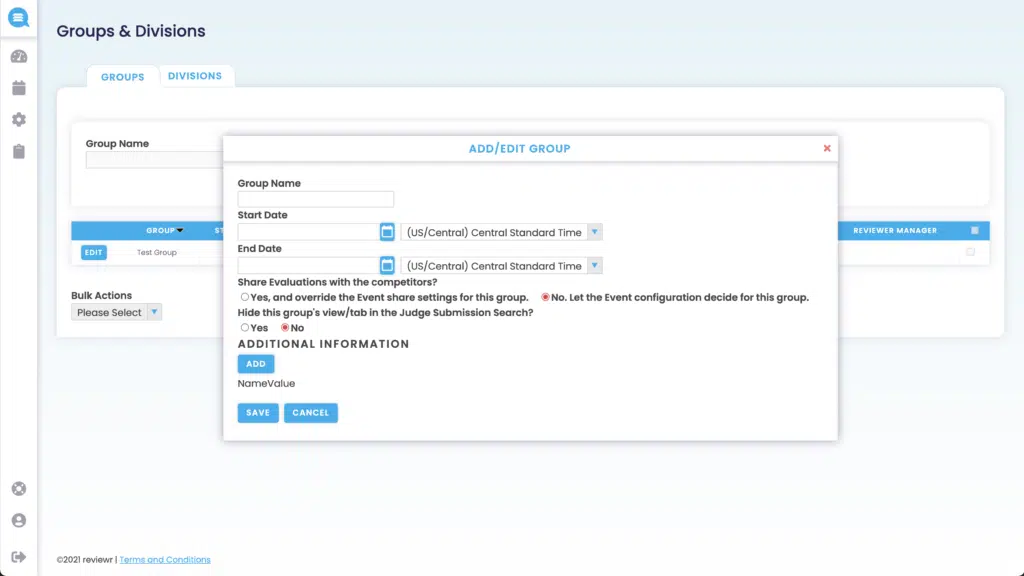
Group Name – This will be the name for the group
Start Date and End Date – Have complete control over dates and deadlines for specific workflows. With open and close dates at the group level, you are able to manage editing ability for applicants and evaluations for certain segments of submissions.
Share evaluations with the competitors? – This should be enabled if you would like members in this group to see their evaluations on their own submissions
Hide this group’s view/tab in the Judge Submission Search? – This should be enabled if you would like to hide a group from
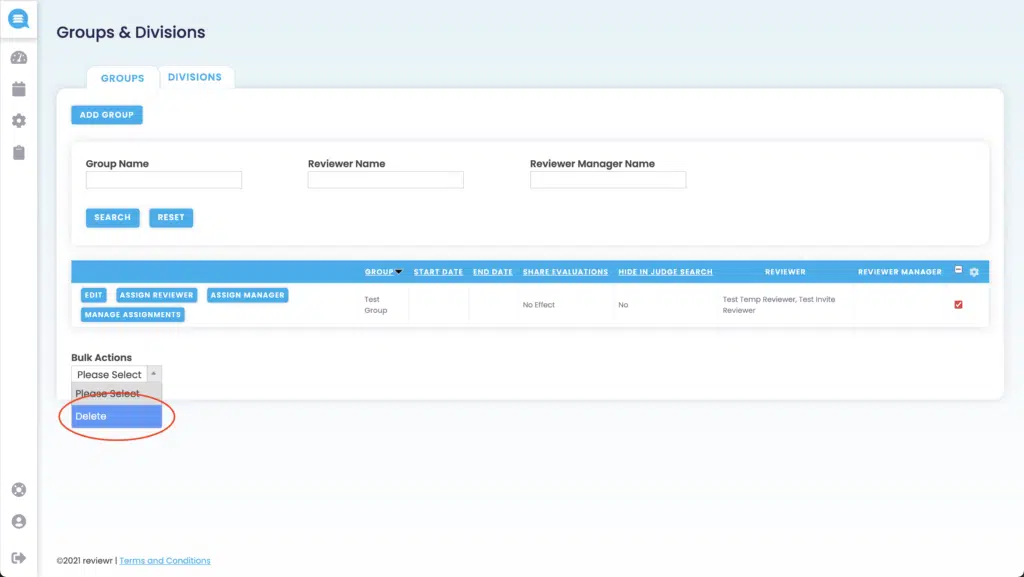
You can search for groups by Group Name, Reviewer Name, or Reviewer Manager Name
You can sort groups by Group Name, Start Date, End Date, if Evaluations are Shared, and if the Group if Hidden from Judges by selecting the applicable option in the blue row above the group list
You can also Edit, Assign Reviewers, Assign Manager, and Management Assignments for each group
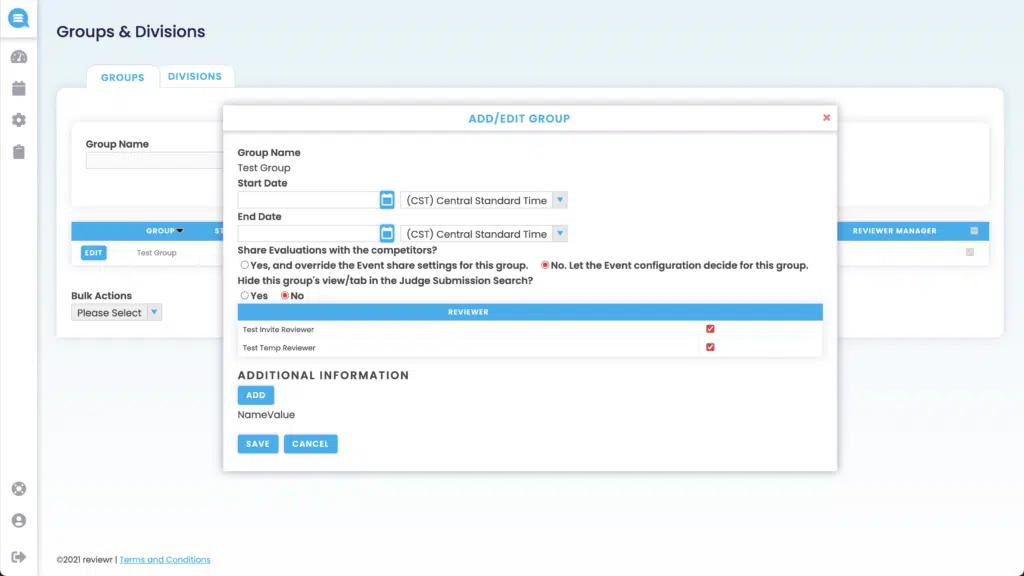
Edit – This allows you to change the Group Name, Start and End Dates, Auto-Assign Functions, Evaluation Share Settings, and Group Visibility Settings

Assign Reviewers – This will allow you to assign judges to a group to review the submissions in that group
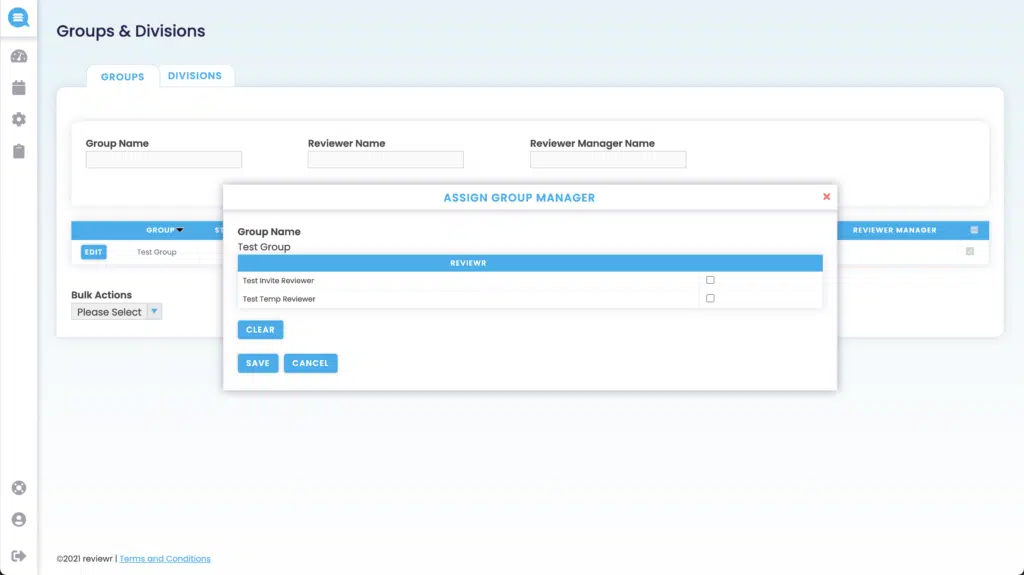
Assign Manager – This allows you to assign a manager for the group. The manager will be a judge who will be able to do all the actions an admin can do, just for that group.
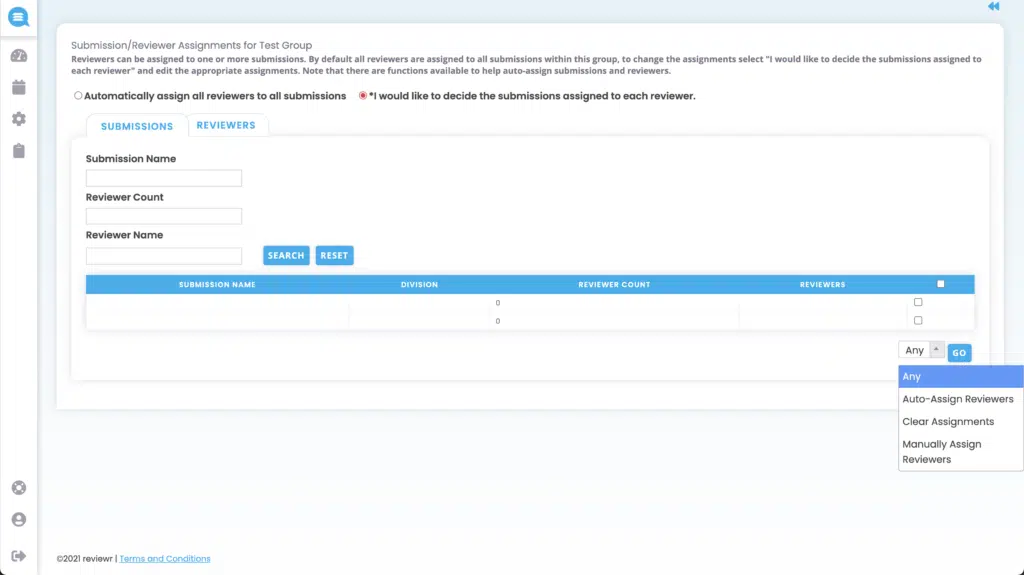
Upon selecting Manage Assignments for a Group, you’ll have two options:
- Automatically assign all reviewers to all submissions – This should be selected unless you are manually assigning a certain number of judges to a submission or assigning a certain number of submissions to a judge
- I would like to decide the submissions assigned to each reviewer – This should be selected if you are manually assigning a certain number of judges to a submission or assigning a certain number of submissions to a judge

Submissions
The Submissions tab will allow you to search for a submission by Submission Name, Reviewer Count, or Reviewer Name
- You can select one or more submission(s) by checking (‘s) on the far right. From there you can select one of the following options (Auto-Assign Reviewers, Clear Assignments, and Manually Assign Reviewers) from the and then select
- Auto-Assign Reviewers – This will ask for a maximum and minimum amount of judges to be assigned to the selected submission(s)
- Clear Assignments – Will clear all assigned judges from the selected submission(s)
- Manually Assign Reviewers – This will allow you to pick specific reviewers to be assigned to the selected submission(s)
- After any of the following, select , to save the changes
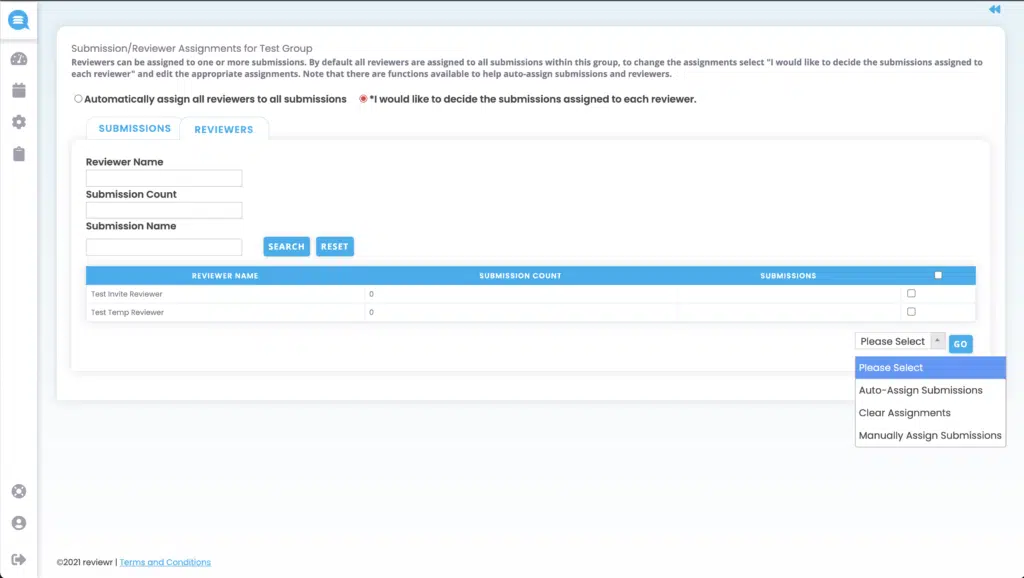
Reviewers
The Reviewers tab will allow you to search for a reviewer by Reviewer Name, Submission Count (assigned submissions), or Submission Name
- You can select one or more reviewer(s) by checking the (‘s) on the far right. From there you can select on of the following options (Auto-Assign Submissions, Clear Assignments, and Manually Assign Submissions) from the and then select
- Auto-Assign Submissions – This will ask for a maximum and minimum amount of submissions to be assigned to the selected judge(s)
- Clear Assignments – Will clear all assigned submissions from the selected judge(s)
- Manually Assign Submissions – This will allow you to pick specific submissions to be assigned to the selected judge(s)
- After any of the following, select , to save the changes
You can also Delete multiple groups through the Bulk Actions option
Division
To add a division, select .
Name – This will be the name for the division
Then select to add the division
To edit a division, select
Name – This will be the name for the division
Then select to save the changes.
